Have you ever been stranded with a flat bicycle tire, unsure of how to fix it? Changing a bicycle inner tube is a fundamental skill that every cyclist should master. With the right tools and techniques, you can get back on the road or trail in no time. This guide will walk you through the process step-by-step, ensuring you’re prepared for this common cycling hiccup. Get ready to empower your cycling experience with this essential knowledge!
Tools and Materials Needed
Changing a bicycle inner tube is a fundamental skill that every cyclist should master. It can seem daunting at first, but with the right tools and materials, it becomes a straightforward task. To ensure a smooth and efficient process, having all necessary items on hand before you start is crucial. This will not only save time but also prevent any mid-repair trips to the store.
The first essential item is a new inner tube that matches the size of your tire. It’s important to check the sidewall of your current tire for the correct dimensions. Next, you’ll need a set of tire levers; these are indispensable for removing the tire from the rim. A bicycle pump or a CO2 inflator is also necessary to inflate the new tube once it’s in place. While not always required, a patch kit can be a lifesaver if your new tube happens to get punctured during the installation process. Lastly, consider having a bucket of water nearby if you suspect the old tube has a slow leak, as this can help locate the puncture. For those who prefer to clean the rim and check for spokes issues, having a rag and basic hand tools might be beneficial.
With these tools and materials, you’ll be well-prepared to tackle a tube change. Remember, the key to a successful repair is not only having the right tools but also knowing how to use them effectively. Take the time to familiarize yourself with each tool and its function in the process. This knowledge, combined with a bit of practice, will ensure that you can handle a flat tire calmly and efficiently, getting you back on the road or trail in no time.
- New inner tube of the correct size
- Tire levers
- Bicycle pump or CO2 inflator
- Patch kit (optional)
- Bucket of water (for leak detection)
Essential Tools for Changing a Bicycle Inner Tube
Changing a bicycle inner tube is a straightforward process that every cyclist should know how to perform. Whether you’re dealing with a flat tire on the road or at home, having the right tools can make the job much easier and quicker. The most essential items you’ll need include a set of tire levers, a new inner tube, and a bicycle pump. Tire levers are indispensable for gently prying the tire off the rim, while a quality bicycle pump will ensure your new tube is inflated to the correct pressure, providing a smooth ride.
Before beginning, it’s important to remove the wheel from your bike. For most bicycles, this involves opening the quick release lever or unscrewing the nuts that hold the wheel in place. Once the wheel is removed, use the tire levers to carefully remove one side of the tire from the rim, creating enough space to extract the damaged inner tube and insert the new one. Be mindful to check the tire for any sharp objects or debris that may have caused the puncture to prevent immediate reoccurrence.
After placing the new inner tube into the tire and tucking it back into the rim, use the bicycle pump to inflate the tube to the recommended pressure. This step is crucial for ensuring your bike performs well and reduces the risk of future flats. Reattach the wheel to your bike, and you’re ready to hit the road again.
Recommended Tools and Accessories for Changing a Bicycle Inner Tube
| Tool/Accessory | Use | Why It’s Essential |
|---|---|---|
| Tire Levers | Removing the tire from the rim | Without these, it’s nearly impossible to remove the tire without damaging it or the rim. |
| New Inner Tube | Replacing the punctured tube | A spare tube ensures you can fix a flat anywhere, anytime. |
| Bicycle Pump | Inflating the new inner tube | Proper inflation is key to a smooth ride and avoiding pinch flats. |
| Patch Kit | Repairing small punctures | A quick fix if a new tube isn’t available, extending your ride. |
| Water and Soap Solution | Locating punctures | Helps in finding and marking punctures when a replacement tube isn’t an option. |
Having the right tools and knowing how to use them efficiently can significantly enhance your cycling experience, ensuring you spend more time riding and less time sidelined by flats. This quick and easy guide to changing a bicycle inner tube, complemented by the recommended tools and accessories, provides cyclists with the knowledge and equipment necessary to address one of the most common mechanical issues faced on the road or trail.
Removing the Wheel
Before you can get to the task of changing your bicycle inner tube, the first essential step is to remove the wheel from your bike. This might sound daunting to some, especially if you’re not accustomed to performing your own bicycle maintenance, but it’s a straightforward process once you know the steps. Whether you’re dealing with a front or rear wheel, the method remains largely the same, with just slight variations depending on the type of brakes your bicycle has.
To start, if your bike is equipped with rim brakes, you’ll need to open them. This is typically done by lifting the brake lever found on the brake caliper itself, which releases the tension and allows the wheel to move freely. For bikes with disc brakes, this step can be skipped. Next, you’ll have to deal with the wheel’s attachment to the bike frame. Most modern bicycles come with a quick-release lever which, when opened, loosens the grip on the wheel without the need for tools. If your bike uses bolt-on wheels, you will require a wrench to loosen and remove the nuts that hold the wheel in place.
With the brakes disengaged and the wheel’s attachment mechanism loosened, you can now safely remove the wheel. For the front wheel, simply lift the bike slightly and allow the wheel to drop out. For the rear wheel, it might be necessary to lift the chain clear of the cogset before easing the wheel out of the frame. Remember, handling the chain and cogset can leave grease on your hands, so you might want to wear gloves or have a rag handy.
Additional insights and context:
Removing the wheel is a fundamental skill for any cyclist and serves as the gateway to more complex maintenance tasks, such as changing the inner tube, fixing a puncture, or even replacing the tire. It’s a good idea to familiarize yourself with this process in a controlled environment before you find yourself needing to do it on the roadside. A little practice goes a long way in making wheel removal a quick and stress-free part of your cycling routine.
- Open rim brakes or skip this step for disc brakes.
- Loosen the quick-release lever or use a wrench for bolt-on wheels.
- Lift the bike and remove the front wheel, or ease the rear wheel out with care for the chain and cogset.
- Consider wearing gloves to avoid grease from the chain.
- Practice wheel removal to become proficient and reduce roadside repair time.
Taking Out the Old Inner Tube
Removing an old inner tube from a bicycle wheel is a straightforward process that requires minimal tools but a bit of patience and technique. The first step is to ensure that your bike is stable and upright, either by using a bike stand or flipping it so it rests on the handlebars and seat. Next, fully deflate the inner tube by pressing down on the valve. If you’re working with a Presta valve, remember to unscrew the small nut at the top before pressing.
Once the tube is deflated, use a set of tire levers to gently pry the tire away from the rim. Insert the flat end of one tire lever under the tire’s bead and hook the other end onto a spoke for leverage. Then, take the second lever and slide it around the rim, separating the tire further until one side is completely free. Now, you can easily pull the tube out from between the tire and the rim. Be mindful to check both the tire and rim for any sharp objects or debris that might have caused the puncture, as failing to remove these can damage your new tube.
Before inserting a new tube, it’s a good practice to slightly inflate it, making it easier to place inside the tire and ensuring it sits evenly. This small step can prevent pinching, which often leads to another flat. Replacing an inner tube is a valuable skill for any cyclist, saving time and money on repairs and keeping you riding smoothly.
- Ensure the bike is stable and upright.
- Fully deflate the inner tube by pressing down on the valve.
- Use tire levers to pry the tire away from the rim.
- Remove the old tube from between the tire and rim.
- Check the tire and rim for sharp objects or debris.
Installing the New Inner Tube
Once you have successfully removed the old inner tube from your bicycle’s tire, the next step is to install the new one, ensuring you’re back on the road or trail as quickly as possible. This process is straightforward but requires attention to detail to avoid any potential issues down the line. Begin by checking the tire and rim for any sharp objects or debris that might puncture the new tube. It’s crucial to ensure that the interior of the tire is clean and free from anything that could cause damage.
Next, slightly inflate the new inner tube; this makes it easier to manipulate and position inside the tire. This slight inflation helps the tube take shape and prevents it from getting twisted or pinched during installation. Carefully insert the valve through the valve hole in the rim, and then gently tuck the rest of the tube into the tire. Work your way around the tire, pushing the tube fully inside. Once the tube is in place, you’ll need to fit the tire back onto the rim. This can sometimes require a bit of force, especially with tighter tires, but be gentle to avoid damaging the tube. Start at the valve and work your way around, using tire levers if necessary, but be cautious not to pinch the tube between the tire and the rim.
After the tire is fully seated on the rim, inflate the tube to the recommended pressure indicated on the tire’s sidewall. It’s important to inflate slowly, checking that the tire is seating correctly on the rim and that there are no parts of the inner tube being pinched between the tire and rim. Once the tire is inflated to the correct pressure, replace the wheel on your bicycle, ensuring that it is securely fastened and aligned correctly. Finally, give the wheel a spin to check for any irregularities and make sure the tire is evenly seated around the rim.
- Check the tire and rim for sharp objects or debris.
- Slightly inflate the new inner tube to give it shape.
- Insert the valve through the valve hole in the rim and tuck the tube into the tire.
- Use tire levers if necessary to fit the tire back onto the rim, being careful not to pinch the tube.
- Slowly inflate the tire to the recommended pressure, checking the seating and alignment.
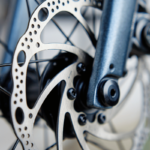
Reattaching the Wheel
Once you’ve successfully replaced the inner tube of your bicycle, the next step is to reattach the wheel to the bike. This process might seem daunting at first, but with a bit of patience and precision, it can be accomplished quickly and efficiently. The first thing you need to do is carefully lift the bike and position the wheel into the fork. Make sure that the axle is aligned with the slots on the fork. For bikes with disc brakes, it’s crucial to align the disc between the brake pads.
Next, if your bike uses a quick-release mechanism, insert the skewer through the axle, ensuring that the lever is on the non-drive side of the bike. Tighten the skewer by turning the nut on the opposite side until it’s snug, then clamp down the lever with sufficient force to secure the wheel in place. For bikes with bolt-on wheels, use a wrench to tighten the nuts on either side of the axle. It’s important to achieve a firm and even tightening to prevent the wheel from wobbling or coming loose during a ride. Before moving on, give the wheel a spin to make sure it rotates freely and doesn’t rub against the brake pads or the frame.
Finally, reengage the brake mechanism if you have disconnected it earlier. For rim brakes, this usually involves reconnecting the brake cable or flipping the brake arm back into its working position. For disc brakes, you might need to adjust the caliper if the wheel was difficult to install or if the brake pads were disturbed. Always perform a safety check by squeezing the brake levers to ensure the brakes engage correctly and the wheel is securely attached.
- Lift the bike and position the wheel in the fork, aligning the axle.
- For quick-release, insert the skewer and tighten. For bolt-on, use a wrench to tighten the nuts.
- Ensure the wheel is firmly and evenly secured.
- Spin the wheel to check for freedom of movement and no rubbing.
- Reengage the brake mechanism and perform a safety check.
Reattaching the wheel is a critical step in ensuring your bike is safe and ready for your next adventure. By following these detailed instructions, you’ll ensure that your bike performs at its best, providing you with a reliable and enjoyable ride. Always remember to double-check your work for safety and efficiency before hitting the road. With practice, this process will become second nature, allowing you to quickly get back to what you love doing most—cycling.
This guide aimed to demystify the process of changing a bicycle inner tube and reattaching the wheel, with a focus on safety and efficiency. Whether you’re a seasoned cyclist or new to bike maintenance, mastering these skills can save you time and enhance your cycling experience. Remember, the key to a successful ride starts with a well-maintained bike. Happy cycling!